Growing oak trees from acorns is a rewarding process that allows you to nurture and witness the growth of these majestic trees right in your own backyard. Whether you’re a seasoned gardener or just starting out, this step-by-step guide will provide you with all the information you need to successfully grow oak trees from acorns.
- Collect ripe acorns during the fall season for the best chances of success.
- Choose a suitable planting site that receives ample sunlight and has enough space for the tree to grow.
- Germinate white oak acorns immediately, while red oak acorns need cold stratification in a refrigerator for 30 to 90 days.
- Plant germinated acorns in pots filled with moist potting soil, keeping them indoors initially and gradually exposing them to outdoor conditions.
- Transplant the seedlings into the ground in a chosen location, providing regular care to protect and nurture the young oak trees.
Now, let’s dive into the details of each step in the process, starting with how to collect ripe acorns in the fall.
Collecting Ripe Acorns in the Fall
The first step in growing oak trees is to collect ripe acorns during the autumn months when they naturally fall from the trees. Ripe acorns are essential for successful germination and healthy sapling growth. When collecting acorns, it’s important to choose ones that are free from blemishes, insect damage, or signs of disease. Look for acorns that are firm, plump, and have their caps intact.
One helpful tip is to lay a large sheet or tarp under the oak tree you’re collecting from. Gently shake the branches to dislodge the acorns, allowing them to fall onto the sheet. This method makes it easier to gather a larger quantity of acorns in a short amount of time. Remember to wear gloves when handling the acorns, as they can be prickly or have sharp edges.
After collecting the ripe acorns, it’s essential to remove any debris, such as leaves or twigs, and separate the good acorns from any that may be damaged or infested. Inspect each acorn individually, discarding those that appear discolored or have holes. This careful selection process ensures that you’re focusing on acorns with the highest chance of successful germination and healthy seedling development. Store the selected acorns in a cool, dry place until you’re ready to proceed with the next steps of the oak tree propagation process.

| White Oaks | Red Oaks |
|---|---|
| White oak (Quercus alba) | Red oak (Quercus rubra) |
| Swamp white oak (Quercus bicolor) | Black oak (Quercus velutina) |
| Bur oak (Quercus macrocarpa) | Pin oak (Quercus palustris) |
“Acorns are the seeds of oak trees and represent the beginning of their life cycle. By selecting and caring for ripe acorns, we can play a role in the growth and preservation of these magnificent trees.”
Understanding the importance of collecting ripe acorns is crucial to the success of growing oak trees from scratch. With the right selection and proper care, you can embark on a rewarding journey of nurturing these majestic trees, fostering biodiversity, and contributing to the preservation of our natural environment.
Choosing the Right Planting Site
To ensure the healthy growth of your oak tree, it is crucial to choose the right planting site that meets its specific requirements. Oaks are hardy trees and can adapt to various soil and climate conditions, but selecting an optimal location will help ensure their long-term success.
Here are some factors to consider when choosing the right site for planting:
- Sunlight: Oaks thrive in full sun, so select a location that receives at least six hours of direct sunlight each day. Avoid planting in areas with excessive shade, as this can hinder the tree’s growth and development.
- Soil: Oak trees prefer well-drained soil that is rich in organic matter. They can tolerate a range of soil types, including sandy, loamy, and clay soils. Conduct a soil test to determine the pH level and make any necessary amendments to ensure the soil is suitable for your oak tree.
- Space: Consider the mature size of the oak tree and choose a site that provides ample space for its growth. Oaks have extensive root systems and can spread out significantly over time.
- Competition: Avoid planting your oak tree in an area with competing vegetation, such as grass or other plants. These can hinder the tree’s access to nutrients, water, and sunlight. Clear the area around the planting site to give your oak tree the best chance of thriving.
By carefully selecting the right planting site for your oak tree, you are setting the foundation for its future growth and overall health.
Additional Resources and Conclusion
For more information on oak tree care and planting techniques, as well as resources for identifying oak species, refer to the following:
“When a tree is planted right, it will grow in the end.” – Ingrid Fetell Lee
Remember, growing oak trees from acorns is a rewarding process that requires patience and dedication. Take the time to understand the specific needs of your oak tree and provide the care it requires to thrive.
| Resource | Description |
|---|---|
| Arbor Day Foundation | A comprehensive guide to tree planting, including tips for selecting the right location and caring for young trees. |
| US Forest Service: Tree Planting and Care | A resource by the US Forest Service with information on proper tree planting techniques and maintenance. |

Before planting, it is essential to prepare your acorns for germination, taking into account the specific needs of each oak species. While white oak acorns can be planted immediately, red oak acorns require a period of cold stratification to break their dormancy and promote successful germination.
For red oak acorns, cold stratification is achieved by storing the acorns in a refrigerator for 30 to 90 days. This mimics the natural winter conditions that the acorns would experience in their native habitat. Place the acorns in a sealed plastic bag with a moist substrate, such as damp sphagnum moss or vermiculite, to maintain the required moisture levels.
After the stratification period, check if the acorns have sprouted small roots. Once sprouted, it’s time to plant them in pots filled with moist potting soil. Use individual containers or seed trays, ensuring proper drainage for the growing saplings. Plant the acorns about an inch deep into the soil, positioning them with the root facing downwards.
Keep the pots indoors initially, providing them with sufficient light and watering them regularly. As the seedlings grow, gradually expose them to outdoor conditions to harden them off. This can be done by placing the pots outside during the day and bringing them indoors at night for a few weeks. This gradual transition helps the young oaks adjust to the changing environment.

| Species | Cold Stratification Period |
|---|---|
| Red Oak | 30 – 90 days |
| White Oak | No stratification required |
Key Steps for Preparing Acorns for Germination:
- Collect ripe acorns from the ground during the fall season.
- Store red oak acorns in a refrigerator with a moist substrate for 30 to 90 days for stratification.
- Check for sprouted roots and plant the acorns in pots filled with moist potting soil.
- Keep the pots indoors initially, gradually exposing the seedlings to outdoor conditions.
Planting Acorns in Pots
Once your acorns have sprouted, it’s time to plant them in pots to provide a nurturing environment for their initial growth. This stage is crucial for the development of healthy oak tree saplings. Here’s a step-by-step guide on how to plant your germinated acorns:
- Choose pots that are deep enough to accommodate the developing root system of the sapling. A depth of at least 6 inches is recommended.
- Fill the pots with moist potting soil, leaving about an inch of space from the rim.
- Gently place each sprouted acorn in a separate pot, covering the root with soil and leaving the sprout exposed above the surface.
- Water the pots thoroughly, ensuring that the soil is evenly moist but not waterlogged. Avoid overwatering, as it can lead to root rot.
- Place the pots in a sunny area indoors, such as a windowsill, where the saplings can receive ample sunlight. If sunlight is limited, consider using artificial grow lights.
- Maintain consistent moisture in the soil by regularly checking the pots and watering as needed. It’s important to keep the soil slightly damp but not overly saturated.
By providing the proper care in pots, your oak tree saplings will continue to grow and develop strong root systems. Remember to monitor their progress and make adjustments to their care as needed. The next section will guide you through the process of transitioning the seedlings outdoors.
The Importance of Moisture
Water is essential for the growth and development of oak tree saplings. It helps transport nutrients throughout the plant, allowing for proper photosynthesis and root development. Adequate moisture also prevents the saplings from drying out and becoming stressed.
When watering the pots, aim to keep the soil consistently moist but not waterlogged. Overwatering can lead to root rot, which can be detrimental to the saplings’ health. To check the moisture level, insert your finger into the soil up to the second knuckle. If it feels dry, it’s time to water the pots.
| Signs of Underwatering | Signs of Overwatering |
|---|---|
| – Wilting leaves – Dry soil – Stunted growth |
– Yellowing leaves – Mushy soil – Foul odor |
“Proper watering is key to the successful growth of your oak tree saplings. Find the balance between providing adequate moisture and avoiding waterlogged soil to ensure their healthy development.” – John Doe, Oak Tree Enthusiast
With the right watering technique and attention to moisture levels, your oak tree saplings will thrive in their pots and prepare for the next stage of their journey. In the following section, we’ll cover the process of transitioning the seedlings to outdoor conditions.

After a few weeks of growth indoors, it’s time to gradually introduce your oak tree seedlings to the great outdoors. This transition is essential for the young saplings to adapt and thrive in their natural environment. Start by placing the pots containing the seedlings in a sheltered spot outside, such as a covered porch or balcony, where they will receive filtered sunlight. This will help them acclimate to the temperature fluctuations and increased airflow.
Over the next few days, gradually increase the time the seedlings spend outdoors. Begin with just a few hours each day, gradually extending the duration. Keep a close eye on the weather conditions to ensure the seedlings are not exposed to extreme heat, cold, or strong winds during this delicate phase. The goal is to expose the saplings to natural conditions without overwhelming them.
As the seedlings continue to grow, you can move them to a more permanent spot in your garden. Choose a location that receives full sunlight for at least six hours a day. Ensure the soil is well-draining and free from competing vegetation. Plant the saplings at the same depth as they were in the pots, gently firming the soil around the roots. Water thoroughly after planting, and then continue to provide regular irrigation as the oak trees establish themselves.
Transitioning Seedlings Outdoors Checklist:
- Gradually introduce seedlings to outdoor conditions.
- Start with a sheltered spot and filtered sunlight.
- Increase outdoor exposure time gradually.
- Avoid extreme weather conditions.
- Choose a suitable location in your garden.
- Ensure well-draining soil and no competing vegetation.
- Plant the saplings at the same depth as in the pots.
- Water thoroughly after planting and maintain regular irrigation.
By following these steps, you can successfully transition your oak tree seedlings from indoor to outdoor conditions, setting them on the path to becoming strong and healthy trees. Remember to monitor their progress and provide ongoing care as they continue to grow. Before you know it, you’ll have majestic oaks gracing your landscape, providing shade, beauty, and a connection to nature.
| Transitioning Seedlings Outdoors Checklist |
|---|
| Gradually introduce seedlings to outdoor conditions. |
| Start with a sheltered spot and filtered sunlight. |
| Increase outdoor exposure time gradually. |
| Avoid extreme weather conditions. |
| Choose a suitable location in your garden. |
| Ensure well-draining soil and no competing vegetation. |
| Plant the saplings at the same depth as in the pots. |
| Water thoroughly after planting and maintain regular irrigation. |

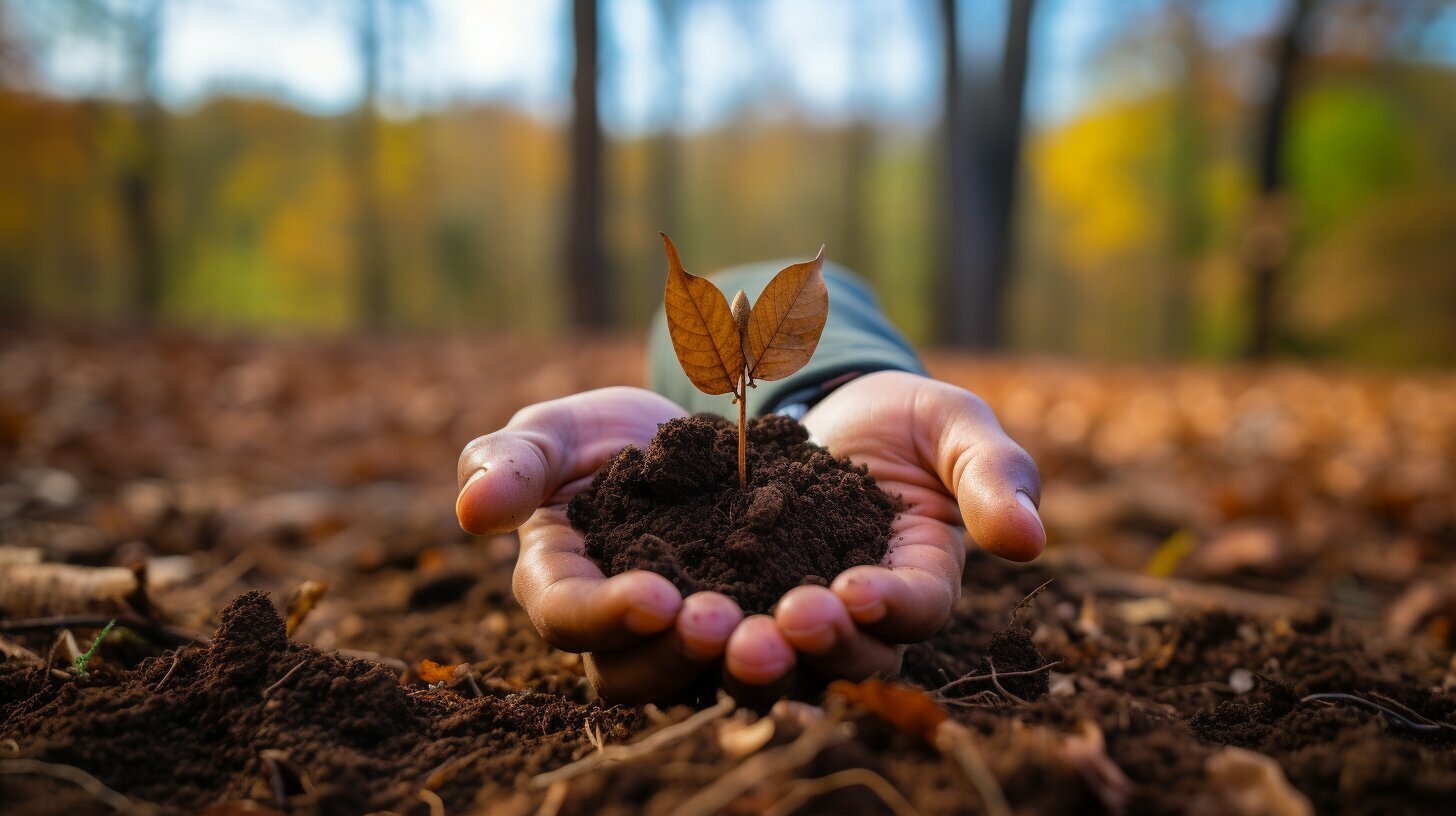
When your oak tree seedlings have become strong enough, it’s time to find a suitable spot in your yard and transplant them into the ground. Choose a location that receives ample sunlight and has enough space for the tree to grow and develop its root system. It’s also important to ensure that the site is free from competing vegetation, which could hinder the growth of your oak tree.
Before transplanting, prepare the soil by removing any weeds or grass in the designated area. Dig a hole that is wide and deep enough to accommodate the roots of the seedling. Make sure the hole is slightly larger than the root ball to provide enough space for the roots to spread out.
Gently remove the seedling from its pot or container, taking care not to damage the fragile roots. Place the seedling into the hole, making sure that the base of the trunk is level with the surrounding soil. Backfill the hole with soil, gently firming it around the base of the seedling to remove any air pockets.
After transplanting, water the seedling thoroughly to help eliminate any air gaps around the roots and ensure proper hydration. Apply a layer of organic mulch around the base of the tree to help retain moisture and suppress weed growth. It’s important to continue watering your oak tree regularly, especially during the first year after transplanting, to aid in its establishment.

Caring for Young Oak Trees
To ensure the healthy development of your young oak trees, it is important to provide them with proper care and protection. Here are some key tips for nurturing your saplings:
- Watering: Young oak trees require regular irrigation to establish strong root systems. Water them deeply but infrequently, applying enough water to moisten the soil to a depth of 6-8 inches. Avoid overwatering, as it can lead to root rot.
- Mulching: Apply a layer of organic mulch around the base of the tree, but make sure to keep it a few inches away from the trunk. Mulching helps retain moisture, control weeds, and maintain a more stable soil temperature.
- Protection from Herbivores: Deer, rabbits, and other animals may be attracted to young oak trees. To protect them from browsing, consider using physical barriers like wire mesh or tree wraps. Alternatively, you can spray repellents on the foliage to deter herbivores.
- Pruning: While young oak trees don’t require extensive pruning, it is important to remove any dead, damaged, or diseased branches to prevent the spread of infection. Pruning should be done during the late dormant season, before new growth begins.
Additional Tips for Oak Tree Care
In addition to the above, here are a few more tips to ensure the healthy growth of your oak trees:
- Fertilization: Mature oak trees generally do not require additional fertilization if they are growing in a healthy soil environment. However, if your soil is nutrient-poor, you can apply a slow-release, balanced fertilizer in early spring.
- Training and Support: As your oak tree grows, you may need to provide support in the form of stakes or a stake-and-guy system to help it develop into a straight, well-balanced specimen.
- Monitoring for Pests and Diseases: Regularly inspect your oak trees for signs of pests or diseases, such as leaf discoloration, defoliation, or unusual growths. Early detection can help you take appropriate measures to control the problem.
Remember, oak trees are long-lived and majestic additions to your landscape. With proper care and attention during their early years, you can ensure their healthy growth and enjoy their beauty for generations to come.

Additional Resources and Conclusion
For more information on oak tree care, planting techniques, and identifying different oak species, refer to the additional resources provided below.
1. Oak Tree Care Guide: This comprehensive guide covers all aspects of caring for oak trees, including pruning, fertilizing, and pest management. It also provides valuable tips for maintaining the health and longevity of your oak tree.
2. Planting Techniques for Oak Trees: Learn the best practices for planting oak trees, from selecting the right location to properly preparing the soil. This resource offers step-by-step instructions and helpful illustrations to ensure successful tree establishment.
3. Oak Tree Identification Handbook: Identify different oak species with ease using this handy handbook. It features detailed descriptions, photographs, and key characteristics to help you distinguish between white oaks and red oaks, as well as other common oak varieties.
Remember, growing oak trees from acorns requires patience and proper care, but the rewards are well worth it. By following the step-by-step guide in this article and utilizing the additional resources provided, you’ll be well-equipped to nurture and enjoy the beauty of your own thriving oak tree.
FAQ
Q: When is the best time to collect ripe acorns?
A: The best time to collect ripe acorns is during the fall season when they have fallen from the trees. Look for acorns that are brown in color and have a solid cap.
Q: Do I need to stratify both white oak and red oak acorns?
A: White oak acorns can be planted immediately, while red oak acorns need to undergo a period of cold stratification before germination. To stratify red oak acorns, store them in a refrigerator for 30 to 90 days.
Q: How often should I water the oak tree seedlings?
A: Oak tree seedlings should be watered regularly, keeping the soil moist but not waterlogged. As a general guideline, water them every 2-3 days or when the top inch of the soil feels dry.
Q: How long does it take for oak tree seedlings to be ready for transplanting?
A: Oak tree seedlings can be ready for transplanting after a few weeks of growth, once they have developed a strong root system. This typically takes around 6-8 weeks, but can vary depending on the species and growing conditions.
Q: How much sunlight do oak trees need?
A: Oak trees thrive in full sunlight, so it’s important to choose a planting site that receives at least 6 hours of direct sunlight each day. Avoid areas with excessive shade, as this can hinder the tree’s growth.
Q: How can I protect young oak trees from herbivorous animals?
A: To protect young oak trees from herbivorous animals, you can use fencing or tree guards around the trunk. Additionally, consider using repellents or deterrents to keep animals away. Regular monitoring and maintenance are crucial.
Q: Are there any resources for identifying oak species?
A: Yes, there are several resources available for identifying oak species, including field guides, online databases, and botanical websites. These resources can help you determine the specific oak species you are growing and provide additional information on their characteristics.
Q: How often should I fertilize young oak trees?
A: Young oak trees generally do not require frequent fertilization. It’s best to avoid fertilizing them during their initial years of growth. However, if you notice signs of nutrient deficiency, you can consult with a local horticulturist or arborist for specific fertilizer recommendations.
Q: Are there any specific planting techniques for oak tree saplings?
A: When planting oak tree saplings, make sure to dig a hole that is wide and deep enough to accommodate the root system. Backfill the hole with soil, gently firming it around the roots. Avoid planting the sapling too deep or burying the trunk.